Suggested steps for installation of a soffit vent (you may have other options). Works best with the Duraflo 8×8, 21 sq. in. Standard Gable Vent model # 620808
Determine best location for fan installation. (Recommend using a feeler wire to determine if there are any obstacles which may inhibit installation).
Drill 1/8″ hole in the middle of the proposed installation location.
Sing a wire (such as a coat hanger) bend it about 9″ and insert it into the hole, spin it 360 degrees.
If nothing is in the way proceed to the next step.
If something is in the way, move either to another location or over a few inches from obstacle.
Mark the outline of the vent.
Use a Drill to make holes in the 4 corners of the outline.
Recommend the use of a jig or reciprocating saw to cut outline.
Drill ½” hole in location where the wire to the solar panel is to be located.
Carefully cut inner scored line required to mount fan into vent and secure. Recommend 4 3/4” #6 screws.
Route wire through hole and mount vent (be sure to mount vent as recommended by manufacturer).
Mount and adjust solar panel on roof where best exposed sun will be located.
Connect and secure wiring as needed.
Gable End Installation Instructions
Suggested steps for installation of a gable end vent (you may have other options). Works best with the Duraflo 8×8, 21 sq. in. Standard Gable Vent model # 620808.
Determine best location for fan installation.
Best to ensure there is no rafter support in middle of gabled end, or electrical wiring (A look in the attic is recommended prior to installation).
Mark the outline of the vent.
Use a Drill to make holes in the 4 corners of the outline.
Recommend the use of a jig or reciprocating saw to cut outline.
Drill ½” hole in location where the wire to the solar panel is to be located.
Carefully cut the inner scored line required to mount fan into vent and secure. Recommend 4 3/4” #6 screws.
Route wire through hole and mount vent (be sure to mount vent as recommended by manufacturer).
Mount and adjust solar panel on roof where best exposed sun will be located.
Connect and secure wiring as needed.
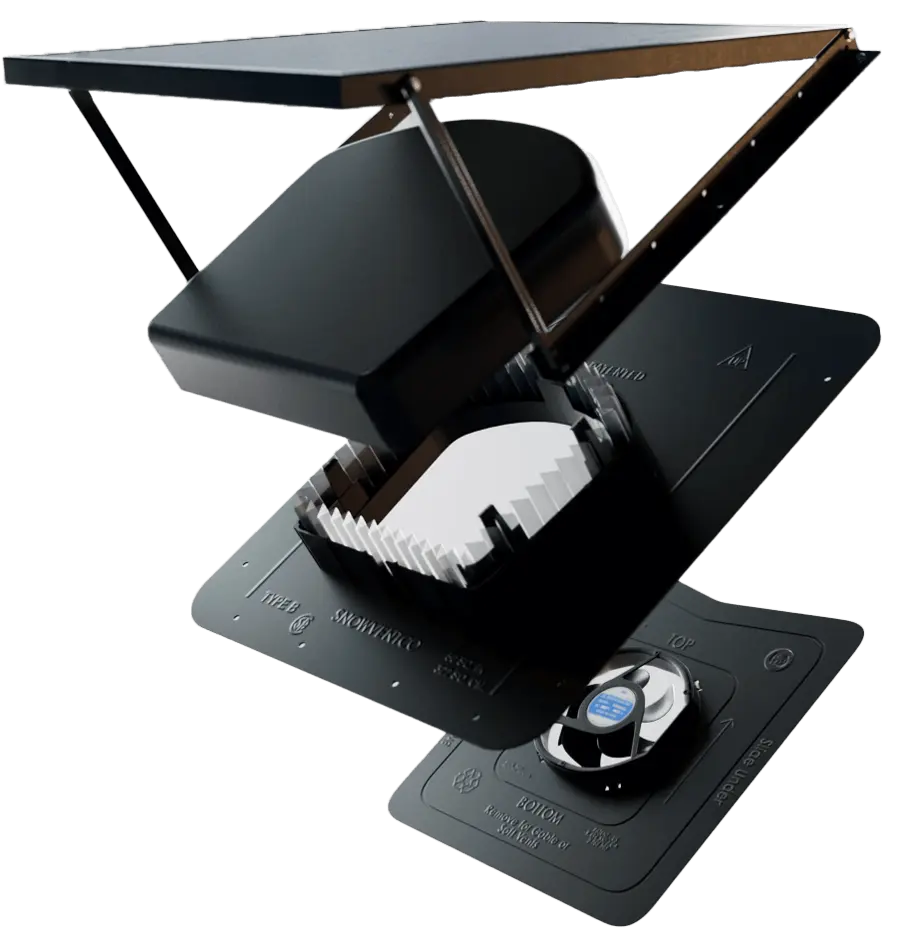
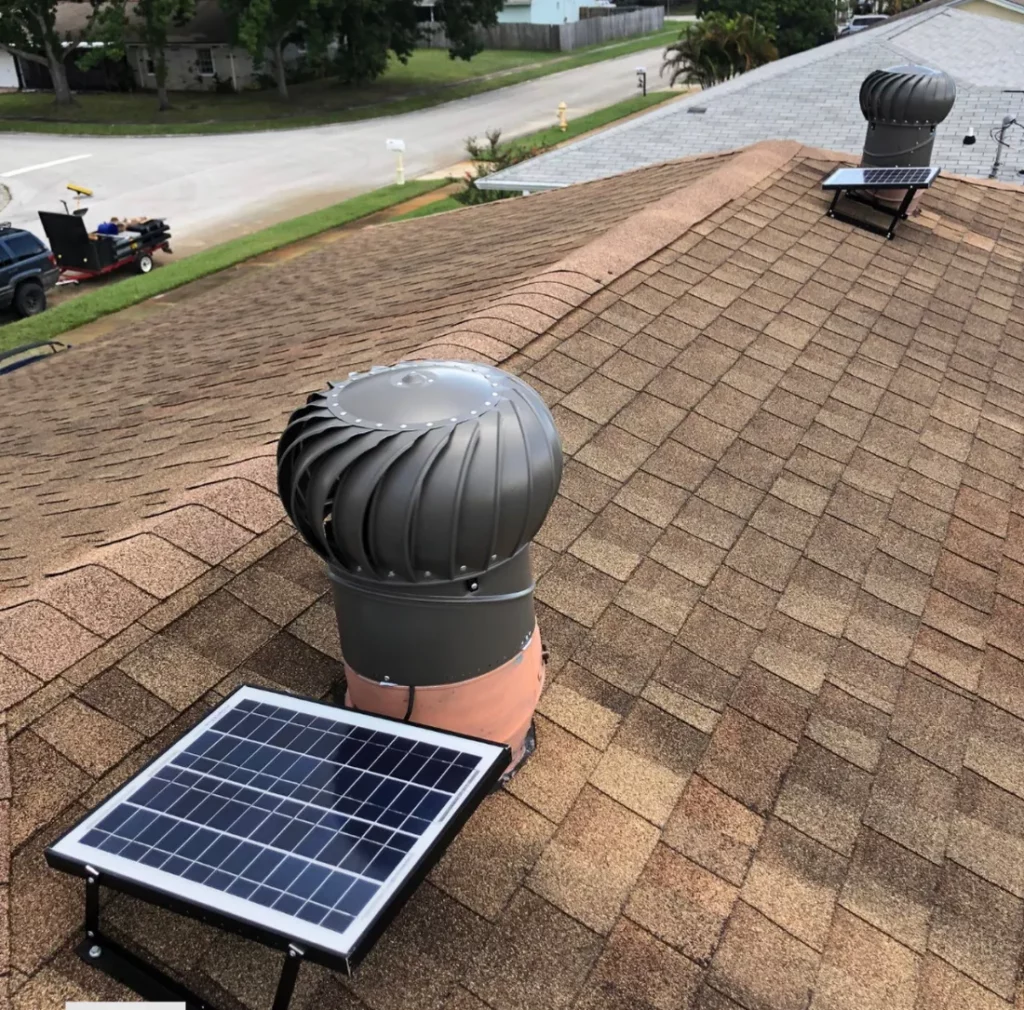
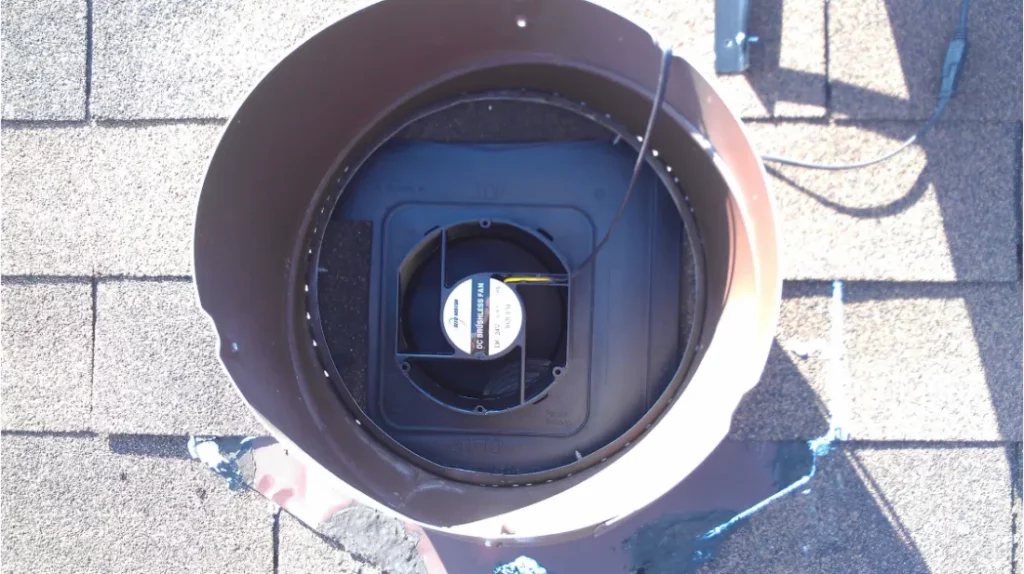
Turbine Vent Installation Instructions
WARNING: To protect yourself and others from injury, always exercise caution and use appropriate safety gear (restraints, safety glasses, gloves, etc.) when using a ladder, working on a rooftop, using power tools or handling a vent unit. Installation work and electrical wiring must be completed in accordance with all applicable building codes and standards, including fire requirements.
Suggested steps for installation of a soffit vent (you may have other options). Works best with the Duraflo 8×8, 21 sq. in. Standard Gable Vent model # 620808
Determine best location for fan installation. (Recommend using a feeler wire to determine if there are any obstacles which may inhibit installation).
Drill 1/8″ hole in the middle of the proposed installation location.
Sing a wire (such as a coat hanger) bend it about 9″ and insert it into the hole, spin it 360 degrees.
If nothing is in the way proceed to the next step.
If something is in the way, move either to another location or over a few inches from obstacle.
Mark the outline of the vent.
Use a Drill to make holes in the 4 corners of the outline.
Recommend the use of a jig or reciprocating saw to cut outline.
Drill ½” hole in location where the wire to the solar panel is to be located.
Carefully cut inner scored line required to mount fan into vent and secure. Recommend 4 3/4” #6 screws.
Route wire through hole and mount vent (be sure to mount vent as recommended by manufacturer).
Mount and adjust solar panel on roof where best exposed sun will be located.
Connect and secure wiring as needed.
Gable End Installation Instructions
Suggested steps for installation of a gable end vent (you may have other options). Works best with the Duraflo 8×8, 21 sq. in. Standard Gable Vent model # 620808.
Determine best location for fan installation.
Best to ensure there is no rafter support in middle of gabled end, or electrical wiring (A look in the attic is recommended prior to installation).
Mark the outline of the vent.
Use a Drill to make holes in the 4 corners of the outline.
Recommend the use of a jig or reciprocating saw to cut outline.
Drill ½” hole in location where the wire to the solar panel is to be located.
Carefully cut the inner scored line required to mount fan into vent and secure. Recommend 4 3/4” #6 screws.
Route wire through hole and mount vent (be sure to mount vent as recommended by manufacturer).
Mount and adjust solar panel on roof where best exposed sun will be located.
Connect and secure wiring as needed.
Turbine Vent Installation Instructions
WARNING: To protect yourself and others from injury, always exercise caution and use appropriate safety gear (restraints, safety glasses, gloves, etc.) when using a ladder, working on a rooftop, using power tools or handling a vent unit. Installation work and electrical wiring must be completed in accordance with all applicable building codes and standards, including fire requirements.